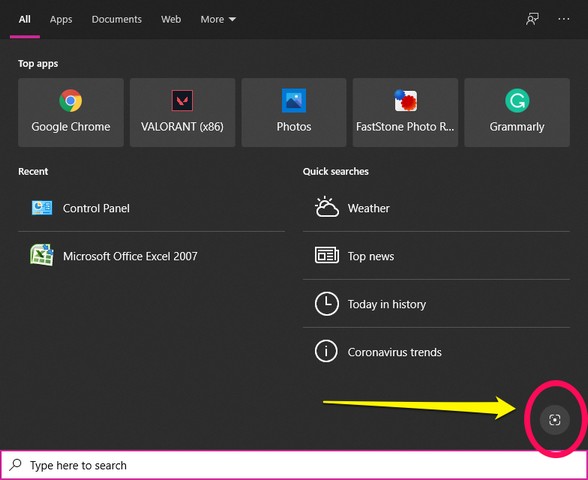
So, if you are unaware of this relatively new feature, it works exactly as it sounds and lets users perform an image search with a screenshot. It resides at the bottom-right corner of the Windows 10 Search UI and works perfectly fine.
How to Use Visual Search on Windows 10
If you are someone who likes to search for clothes or furniture shown off in movies, then you may want to use this feature. You just need to follow the steps below:
Open the “Search” UI from the taskbar on your Windows 10 PC or laptop. Look for the button with the screenshot logo at the bottom-right corner.
Click it to open the screenshot-capturing page. Capture a screenshot of a webpage or an image. Now, wait for the system to analyze the image and present the search results.
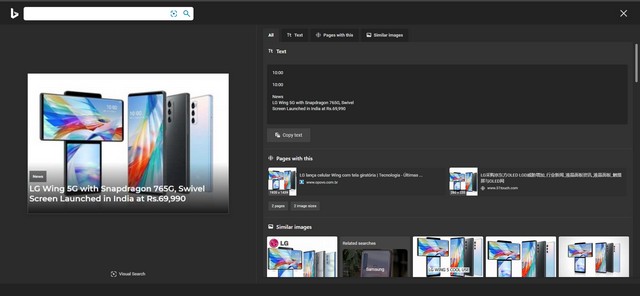
After a few seconds of capturing your screenshot, Windows will open up the search results, based on your screenshot, on the Edge browser, even if it is not your default browser. The feature is programmed to work with Edge and display the results on Microsoft’s own web browser, which is not a big issue now.
Now, as you can see in the image above, the feature works pretty well and extracts everything it can get from the given screenshot. It separates the texts and the products (if any) and shows similar images and links on the web. So, if you are in a situation in which you need to search using the data on your screen, then be sure to use this nifty Windows 10 feature to your advantage. Moreover, as it can analyze and extract texts from images, you can also use it as a text-extractor and copy them from the images.